Grill Master's Guide to a Perfect Reverse Sear
|
|
Time to read 7 min
|
|
Time to read 7 min
Grill Masters all over the world love the reverse sear. It’s a grilling technique that’s been around for just over twenty years, and was popularized by James Beard award-winning chef J. Kenji Lopez-Alt. But you don’t have to be a master chef to pull off the perfect reverse sear! Today, we’re going to share all of the secrets you need to know to grill up your favorites with the reverse sear technique.
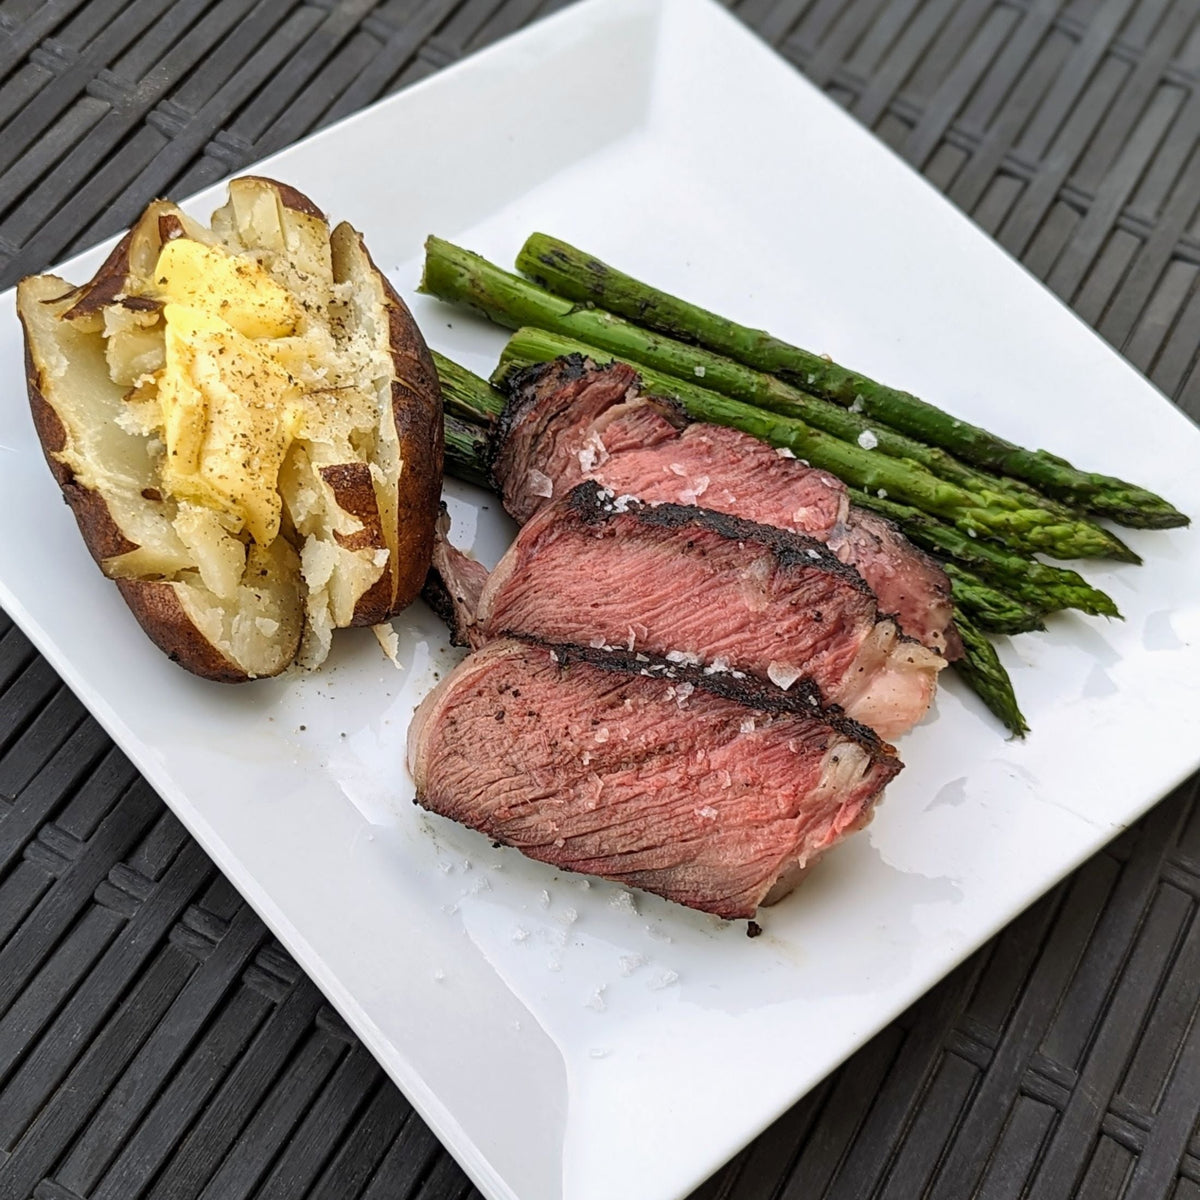
Photography by Marc (@ales.n.tails) who turned us on to Reverse Searing in the first place. Thanks Marc!
Table of content
First, let’s explain what a reverse sear actually is. This technique has gained popularity among culinary enthusiasts and home chefs for its ability to produce perfectly cooked, evenly colored, and flavorful dishes. This method, often used for thick cuts of meat like steaks or roasts, involves reversing the traditional order of cooking steps. First, you slow-cook the meat at a lower temperature. Then, you finish it with a high-heat sear.
The process starts with bringing the meat to an internal temperature that is just below the desired doneness. This is typically done using indirect heat. Some people use a cooler part of the grill, but you’ll have much more control if you use an oven.
The point of slow-cooking is that you’ll have precise control over the meat's internal temperature. This reduces the risk of overcooking the outer layers while waiting for the center to reach the desired doneness. This slow-cooking phase also helps to break down collagen and render fat, resulting in a more tender and flavorful end product.
After reaching the desired internal temperature, the meat is then subjected to a quick sear on high heat to develop a caramelized crust on the exterior. This final searing step not only imparts a visually appealing golden-brown color but also enhances the overall flavor by creating a Maillard reaction. The Maillard reaction is a complex chemical process that occurs when proteins and sugars react under high heat. It’s what gives your steak that tasty outer layer.
The reverse sear offers several advantages over the traditional searing-then-roasting method. One of the main benefits is the more even distribution of doneness throughout the meat, ensuring that each bite is consistently cooked to perfection. Additionally, the slow-cooking phase allows for a greater margin of error. This makes it so much easier for you to achieve the desired level of doneness without the risk of overcooking.
This technique is particularly well-suited for thicker cuts of meat, as it addresses the challenge of achieving uniform doneness across the entire piece. Whether preparing a thick ribeye steak, a bone-in pork chop, or a roast, the reverse sear method has become a go-to approach for those seeking to elevate the quality of their meat dishes, providing a delectable combination of tenderness, juiciness, and a flavorful crust—all achieved through a carefully orchestrated reversal of the cooking process.
So, ready to start reverse searing? Here’s everything you need to do to create a perfectly cooked, juicy piece of meat.
Start with a thick cut of meat, such as a ribeye steak, pork chop, or roast. Thicker cuts work best with the reverse sear method. Bone-in cuts also work really well with this technique!
Season the meat generously with salt and pepper and your preferred organic spices and grill seasonings. Allow the meat to come to room temperature for more even cooking before putting it in the oven.
Preheat your oven to a low temperature, around 225°F to 250°F . This low heat will slowly cook the meat. Use a meat thermometer to monitor the temperature of your meat.
Place the seasoned meat on a wire rack set inside a baking sheet or pan. This lets the air circulate all around your meat. Slow-cook the protein in the preheated oven until it reaches an internal temperature 5 to 10 degrees below your desired doneness. This could take 30 minutes to a couple of hours, depending on the thickness of the cut. Most steaks and chops will be done between 20 minutes and an hour.
Remove the meat from the oven and let it rest while you prepare for the searing step. This rest allows the juices to redistribute within the meat.
Preheat a skillet, grill, or any high-heat cooking surface. Sear the meat on high heat for a short duration on each side, creating a flavorful crust. This step should take only a few minutes.
Allow the meat to rest for a few minutes before slicing. This rest period lets the juices redistribute, ensuring a juicy and flavorful result.
Slice or serve your meat and watch it disappear. If you’re lucky, there will be enough for seconds!
The exact time your meat will spend in the oven varies based on how thick the meat is and how hot the oven is. This is why it’s so important to use a meat thermometer; the timing is highly variable. Meat continues to cook when you take it out of the oven, so it’s important to pull it early so that you don’t overcook it!
We’ve included this chart as an example of what meat cooking time looks like for ½ inch steaks in an oven set at 250°F.
|
Doneness |
Final Meat Temperature |
Remove At This Temperature |
Approximate Time in Oven |
|
Rare |
120°F |
105°F |
20 to 25 minutes |
|
Medium-Rare |
130°F |
115°F |
25 to 30 minutes |
|
Medium |
140°F |
125°F |
30 to 35 minutes |
|
Medium-Well |
150°F |
135°F |
35 to 40 minutes |
|
Well |
160°F |
145°F |
45-50 minutes |
Want to elevate your reverse seared protein? Here are some of the secrets that will have your guests convinced you’re the king of the grill.
So now that you know everything about this grilling method, what will you try first? Here are some of the best meats to use with the reverse searing technique.
Reverse searing was developed for steak, and it’s no surprise that it’s been well-adapted to several cuts of beef, including:
Thicker cuts of pork are perfect for reverse searing, including:
Yes, you can reverse sear poultry! Just make sure that your cuts are thick enough; an extra-thin pounded chicken cutlet won’t get the full benefits of a reverse sear.
Do you have something slightly more exotic in mind for your grilled dinner? Other types of meat can benefit from the reverse sear method, especially if you’d like them to be more tender.
While traditionally associated with beef, the reverse sear can be adapted for thick fish filets, including:
The appropriate timing for fish in the oven differs from those of other types of meat. Fish has basically no collagen, meaning it dries out much more quickly than meat. Watch your fish closely, as it will get faster more quickly than comparably thick cuts of meat. The FDA recommends that fish be cooked to about 145°F; however, many cooks prefer fish like halibut at 125°F. This means you should pull your fish when your filets get to 110°F-135°F.
No matter what your burgers are made out of– beef, turkey, a blend of meats– you can use the reverse sear technique! Thick, handmade burgers develop a flavorful seared crust and juicy interior using this method. And they taste even better when perfectly flavored with organic spices and grill seasonings.
While cauliflower and portobello mushrooms are often used like meat, you can’t effectively reverse sear them! These steak substitutes don’t have the same type of fibers that you find in meat, and it will just dry out your vegan substitutes. Instead, toss these directly on the grill.
Take your grill game to the next level with FreshJax’s organic spices and grill seasonings. Our flavorful spices and blends will elevate your cooking. Check out our unique catalog for inspiration, and let us know how your reverse searing went in the comments!
A Huge Shout-Out and a Sincere Thank you to Marc@ales.n.tails for turning us on to Reverse Searing as technique. It's a game changer! If you like his work (and his photos), Check out his unique collaboration blend:


